
Any time Windows returns Error Code 52 in the device manager or DXDiag, it means that the operating system was unable to validate the driver digital signature for the device in question. As a result, you won’t be able to update the device’s drivers, and the gadget might as well cease working altogether.
The majority of Windows 7 users have experienced this problem. The error’s cause is unknown, however it appeared for some users after they installed a particular update; since each update was unique, it’s possible that more than one of them is to blame.
Microsoft suggests either running the troubleshooter or manually updating the drivers because it essentially implies a driver failure. However, if you’ve ever dealt with driver problems before, you’ll know that the aforementioned methods seldom work.
Luckily, we have a few additional things that you can do, that will help you cure the issue, and they’ve been confirmed to work for a lot of users with this issue. The first solution, along with the second if your problem is with the USB drivers, is applicable to practically any device experiencing this issue.
Examine the options and pick with the one that works best for you.
Also Read:
- Windows Could Not Prepare The Computer To Boot
- What Happens When a Flash Memory Card is Installed in a Slot And it is Recognized By Windows?
- The Windows Subsystem For Linux Optional Component is Not Enabled. Please Enable It And Try Again.
Method 1: Remove The Two Filters From The USB Filter Table (Only Applies if The Problematic Devices Are The USB drivers)
UpperFilters and LowerFilters are two registry entries that are known to be the root of such problems, and removing them is often the solution. However, altering your registry can create a lot of problems if done incorrectly, so make sure you double-check each step before moving forward.
- To open the Run dialogue box, use the Windows key plus R at the same time. In the Run box, enter regedit and hit Enter. If prompted by UAC, click the “Yes” button.
- Using the left sidebar of Registry Editor, go to the following location:
HKEY_LOCAL_MACHINE\SYSTEM\CurrentControlSet\Control\Class\{36FC9E60-C465-11CF-8056-444553540000}
3. Look for the Top and Bottom Filters. Choose it, then choose Delete from the Edit option in the upper toolbar. Then, confirm by clicking OK. The procedure must be repeated for the second value.
4. When you’re done, exit Registry Editor and restart the computer.
As of right now, you can choose from three distinct paths forward. However, not all of them are applicable in every circumstance; it is recommended that you read through all of them and determine which one works best for you. Apply it to your Code 52 problem and see if that helps.
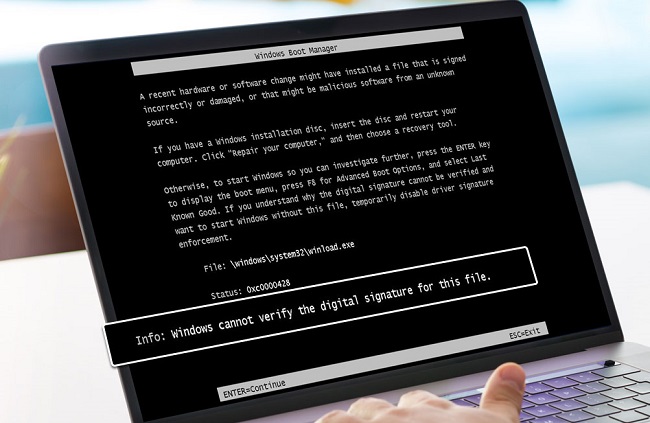
Method 2: In Order to Disable Integrity Checks, You Must Enter an Elevated Command Prompt.
Disabling Windows’ digital signature and integrity verification of devices may solve the problem and allow you to install the necessary drivers. The procedure entails the following steps:
- Windows + R will bring you the search results; right-click the one you want and select “Run as administrator” to launch it with administrative privileges.
- Simply enter each command below into the Command Prompt and hit the Enter key to run it:
bcdedit -set loadoptions DDISABLE_INTEGRITY_CHECKS
bcdedit -set TESTSIGNING ON
3. Please select YES/ALLOW/OK if prompted by UAC.
The second set of commands is for when this first set fails. Launch the Command Prompt as described in Step 1; then, in Step 2, replace the aforementioned commands with the ones below.
bcdedit /deletevalue loadoptions
bcdedit -set TESTSIGNING OFF
At this time, the Code 52 error ought not to be occurring; however, if it is, move on to the subsequent technique.
Method 3: In Windows 8 And 10, Access The Advanced Boot Options Menu. From There, Disable Driver Signing Checking.
Using this method, you can prevent Windows from verifying driver signatures at startup, allowing you to instal drivers for the problematic devices without Windows’ interference.
- To enter the Advanced Boot Options menu, press the F8 key (or Shift + F8) repeatedly as Windows starts. If it doesn’t work, try booting up your machine and pressing the Power button three or more times to force a restart into the expert mode.
- Select Advanced Options > Startup Settings > Restart from the menu that appears. To access Option 7 after the System Restart, select it.
- Upon Windows startup, access the Device Manager to see if a driver update is available. Here are the procedures to follow; just repeat them one by one for any gadget giving you trouble.
- To activate Windows Run, hit the Windows and R keys at the same time. Simply enter devmgmt.msc into the Run box and press Enter.
- Locate the device that’s giving you trouble in Device Manager. It has a yellow exclamation point next to its name, so you can’t miss it.
- Select Device > Update Driver Software from the right-click menu. You should stick with the on-screen instructions until the driver is installed, and then restart your device.
- Do this for each and every gadget that has an asterisk next to it.
Also Read:


")


")


