
Ubuntu is an open-source and cost-free Linux system. In addition to being widely utilised for its software development capabilities, the programme now offers support for Windows 10.
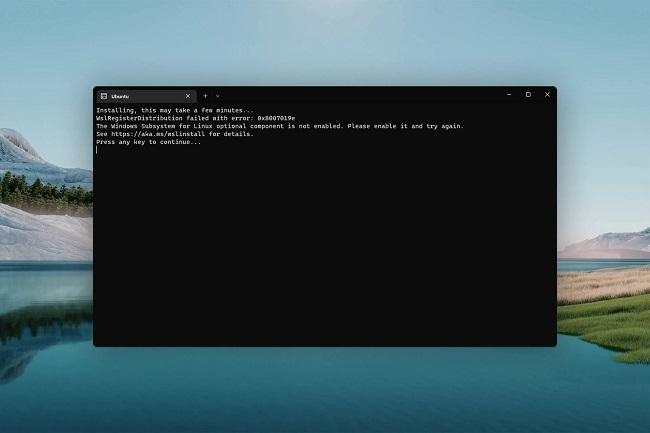
But recently there have been many complaints of customers encountering the error “The WSL Optional Component is not Enabled” when attempting to utilise it. When doing so, you may get the message “Please Enable It and Try Again.”
The WSL Optional Component is Not Enabled” Error: What Could It Be? Ubuntu’s “Please Enable it And Try Again” Error?
Due to the high volume of user complaints, we decided to look into the matter and come up with a plan to permanently resolve it. Additionally, we investigated what causes this problem and compiled the following list.
Partially Inoperable: Error occurs when Windows Subsystem for Linux is disabled as indicated by the error message. Ubuntu requires the Windows Subsystem for Linux, which is only available if you allow it, to function effectively on Windows 10.
This is because Windows Subsystem for Linux offers the necessary configurations and distributions for Ubuntu to function properly.
We will now move on to potential solutions now that you have a firm grasp of the problem’s nature. Avoid tension by taking care with how the answers are put into action.
Also Read:
- Windows Cannot Access The Specified Device Path or File
- How To Transfer Data From One HardDrive To Another Windows 10
- Windows Cannot Verify The Digital Signature For The Drivers Required For This Device
Method 1: Activating WSL in The Settings Menu
We can fix the issue in a handful of different ways. Here, we’ll take the quickest and easiest method to enabling WSL by doing so via the Settings menu. This is why:
Step 1: To bring up the Run dialogue box, press the Windows key along with the letter R.
Step 2: To grant administrative access, use Shift + Ctrl + Enter after typing “Control Panel.”
Step 3: Choose “Small Icons” from the “View By” drop-down menu.
Step 4: To access these features, select “Programs and Features.”
Step 5: Follow the prompts to toggle the features of Windows on and off.
Step 6: Select “Windows Subsystem for Linux” from the drop-down menu.
Step 7: To activate the function, select the “OK” button.
Step 8: Verify whether or not the problem still exists.
Also Read:
- Windows Update Stuck at 100
- How To Install Windows on A New Hard Drive
- How To Install Windows 10 on A New Hard Drive
Method 2: PowerShell Module for Activating WSL
With the help of the Command Prompt, we can activate WSL as well. So now we’ll implement a command on the command prompt to activate the WSL feature. This is why:
Step 1: Simply hit the Windows key along with the letter R to bring up the Run dialogue box.
Step 2: To grant root access, enter “Powershell” and then press Shift+Ctrl+Enter.
Step 3: Press the “Enter” button after entering the following command.
Enable-WindowsOptionalFeature -Online -FeatureName Microsoft-Windows-Subsystem-Linux
Step 4: See if the problem persists after the command has been run.


")


")


