
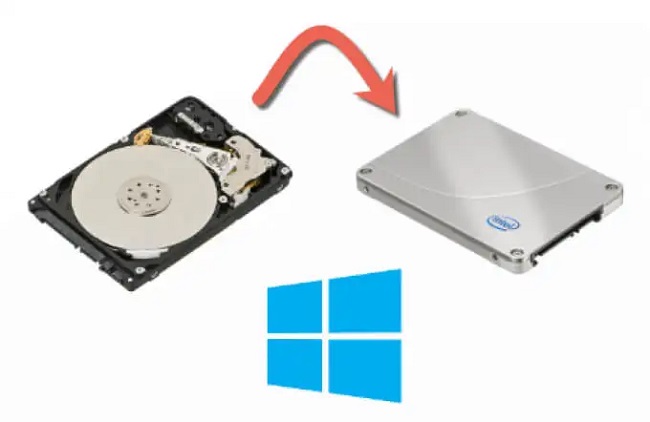
Hard drives have a finite lifespan; even the most reliable models may fail after a few years or, if you’re really lucky, five. Furthermore, if you have a lot of data on your computer, your hard drive may soon feel inadequate, prompting you to seek for an update.
But what about your computer’s operating system? Since the operating system is stored on the hard drive, if you were to switch to a new hard drive or upgrade to a larger one, the OS would be lost.
Method 1: Just Make a Windows Backup Image And Load That Into The Fresh Drive.
First and foremost, using the built-in Windows 10 tools, you may create a system image of your computer and then restore it to a new hard drive, thereby transferring Windows 10 and all of your data to the new drive.
This is the only choice for customers who do not want to utilise any third-party apps for the operation, and it is more time-consuming than just using a tool built particularly for the purpose of transferring your data and operating system from one hard drive to another.
Also Read:
- Windows Could Not Prepare The Computer To Boot
- What Happens When a Flash Memory Card is Installed in a Slot And it is Recognized By Windows?
- The Windows Subsystem For Linux Optional Component is Not Enabled. Please Enable It And Try Again.
Windows 10’s built-in system imaging application will only create an image of the Windows 10 installation partition by default.
Therefore, before making a system image of your computer, you should copy all the files you wish to save to the new hard drive to this partition. In order to use this approach to move Windows 10 to a different hard drive, you must:
- Plug in the external hard disc that will hold the system image. Make sure there’s enough room on the external hard disc to save the system image without any problems.
- The WinX Menu can be accessed by either right-clicking the Start Menu button or pressing the Windows Logo key + X.
- From the WinX menu, select Control Panel.
- Select Backup and Restore from the Control Panel’s Large Icons view (Windows 7).
- To make a system image, select the option on the left side of the window.
- Select the external hard drive you just connected to your computer from the dropdown menu labelled On a hard disc. This must be done if the software does not find the external hard drive and make it the default output location.
- Click on Next.
- As soon as you’ve reviewed the backup’s settings and are ready to get things rolling, select Start Backup.
- You may have to wait a bit for the system image to be produced, depending on how much information Windows needs to back up. When you are finished using the system imaging wizard to produce the system image, you can exit it.
- Replace your old hard drive with the new one (whether or not you wipe your old hard drive clean is entirely your choice), insert the external hard drive the system image is saved on into your computer, and also insert your Windows 10 installation medium into your computer. To generate a bootable Windows 10 installation USB, you can follow the instructions in windows 10 bootable usb, and if you don’t have a DVD burner, you can burn the Windows 10 ISO file.
- The machine has to be booted.
- To enter your computer’s BIOS or Setup, press the key indicated on the first screen that appears while the machine boots up. The key you need to press will be clearly defined on the first screen you see when your computer boots up.
- Choose the Boot menu in the BIOS.
- Set your machine up to start up from the Windows 10 installation media, whether that’s a CD/DVD or a USB flash drive, by changing the Boot order settings.
- Save the modifications you have made to the BIOS and quit it.
- Press any key on the keyboard to have the machine attempt to boot from the installation CD/DVD or USB. When it does, simply press any key to proceed.
- When you see the Windows Setup window, configure your language and other choices, and click on Next.
- Select the option to Fix your computer.
- For help, select Troubleshoot.
- System Image Recovery can be accessed by clicking on the appropriate link.
- To re-image the new hard disc, the software will look for the system image on an external drive attached to the computer, and if it finds one, it will automatically select it. If the programme prompts you to do so, select Next. Alternatively, you can manually select the system image from the external drive by clicking the radio button next to Select a system image, then clicking Next.
- After you’ve finished fine-tuning the system image restoration, click Next on the Choose additional restore choices screen.
- Simply select the Finish button.
- To initiate the re-imaging procedure, click Yes in the subsequent warning popup.
- Please wait for the process to finish; you will be prompted to restart the computer after the new hard drive has been successfully re-imaged and transformed into a clone of the old hard disc. To force the machine to restart immediately, use the Restart now button.
After finishing this process, the new hard drive will be an exact duplicate of the old one, right down to the partitioning scheme. Any space on the new hard drive not used by the partitions included in the system image will become unallocated and will need to be reclaimed before it can be used.
Simply launching the Disk Management programme and executing steps 8–17 from the repartition drive procedure will return the unallocated space to the available disc space.
Method 2: EaseUS Partition Master Can Help You Migrate Windows 10 And All of Your Files to The New Drive.
Instead of taking the time to create a system image of your old hard drive and then re-image your new hard drive with that system image using built-in Windows 10 utilities, you can simply use EaseUS Partition Master, a programme that can clone an entire hard drive (Operating System, data, and all) to another hard drive quickly and effectively.
In addition, unlike a system image made by Windows 10, which only includes the system disc, EaseUS Partition Master moves over a whole hard drive to another hard drive (s). With EaseUS Partition Master, you can easily copy Windows 10 along with all of your data to a new hard drive by simply doing the following steps:
- Get the EaseUS Partition Master installer here.
- Once the installer has finished downloading, you may access it from the location to which it was saved by double-clicking on the file.
- Simply run the installer to set up EaseUS Partition Master.
- You’ll need to have both your old and new drives plugged into the computer for this to work.
- Run EaseUS Partition Master.
- Move Operating System to New Drive.
- Select the new hard drive you just bought by clicking on it, and then click Next.
- A warning will appear if the destination disc already has partitions or data. To ensure that the new drive is completely clean before the transfer of the operating system and data from the old drive, select Yes to allow the software permission to wipe the destination drive.
- Put in your options and then hit OK.
- Check the left pane of the window to see the transfer’s outcome in the section labelled “Pending Operations.” If you are satisfied with the changes, click the Apply button to preserve them (be sure to have the Shut down the computer after changes are applied option enabled).
Also Read:


")


")


